The experience of soaking in a comfortable bath after finishing an exhausting day remains unmatched for everyone. My nightly relaxation involved lighting a candle and listening to calming music before dropping the fizzing bath bombs into the water. The price tags began to concern me while ingredients lists sometimes contained unappealing components. A bright idea suddenly struck me when I decided to make my own bath bombs. The initial curiosity about bath bombs evolved into an enjoyable pastime which has now become my favorite hobby. The craft of creating bath bombs delivers much more than money savings because it provides both creative satisfaction and complete control over relaxation through homemade bath products. The time has arrived for you to transform your bathroom into a spa because this is your signal to begin.
Why Dive into DIY Bath Bombs? The Unseen Benefits
My announcement to make bath bombs from scratch received skeptical looks from friends who viewed my plan as building an impossible spacecraft. “Isn’t that complicated?” they asked. Not at all! Making bath bombs at home allows you to maintain full control over the ingredients and process which represents one of its most important benefits. The benefits of making bath bombs yourself include full control over ingredients and no unknown additives and lower costs than buying pre-made products. You can make at home.
Customizing your bath experience represents a significant advantage above the financial benefits. You have complete freedom to select the colors and scents and ingredients which match your current skin needs. Feeling stressed? Add some lavender. Skin feeling dry? The mixture should include plenty of nourishing oils. You get to act as your own alchemist when making personal blends that meet the needs of your body and mind. Plus, it’s a fantastic creative outlet. The feeling of pride becomes strong when you produce an ideal bath bomb which you created entirely by yourself.
Gathering Your Creative Arsenal: Essential Supplies
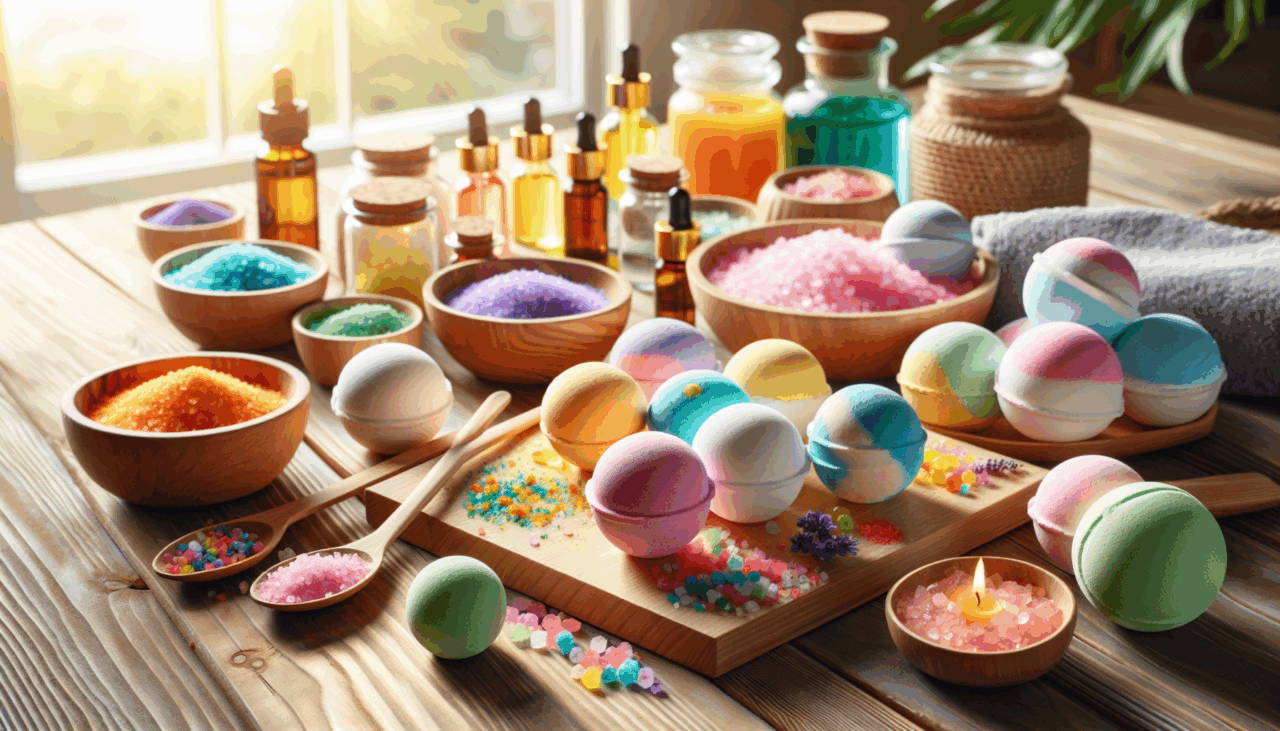
The first step toward crafting perfect fizz requires you to obtain several important bath bomb making supplies. The required materials exist in both online stores and craft stores and you could possibly find some of them in your current pantry supplies. During my first shopping trip I walked through the store like a child in a toy store while selecting all the colorful ingredients and essential oils.
The following items form a fundamental starting point for beginners who wish to learn about homemade bath bombs:
- Baking Soda (Sodium Bicarbonate): The main substance responsible for creating the pleasant fizz in bath bombs.
- Citric Acid: The other half of the fizzing duo. The combination of baking soda with water and citric acid results in a magical reaction.
- Epsom Salts: Epsom salts provide both muscle relaxation and medical benefits to bath water.
- Cornstarch: The ingredient serves two purposes by acting as a binder and creating a harder bath bomb and producing a more uniform fizz.
- Nourishing Oils: You can use coconut oil or almond oil or olive oil as examples of nourishing oils for this purpose. These moisturize your skin and help bind the mixture.
- Essential Oils or Fragrance Oils: Through essential oils or fragrance oils you can enjoy the benefits of aromatherapy magic. The relaxing properties of lavender combine with invigorating peppermint and citrus fragrances to create a mood-enhancing experience.
- Coloring Agents: Bath bomb makers commonly select between mica powders and liquid bath bomb dyes. Food coloring has limited use in bath bombs because it may discolor the bathtub.
- Molds: Plastic or metal bath bomb molds, silicone molds, or even cookie cutters will work.
- Spray Bottle with Water/Witch Hazel: A spray with water or witch hazel assists in mixture binding but avoids premature fizz activation.
- Mixing Bowls and Spoons/Whisks: Non-metal are often preferred, especially with citric acid.
After preparation of your ingredients you will be half way to the blissful bath experience.
The Art of Fizz: How to Make Bath Bombs
Time to get fun as you are about to learn how to make bath bombs by yourself! It might look challenging at first, but it is quite flexible. My first attempt at making bath bombs turned out to be a bit crumbly yet they still bubbled nicely. The trick here is to get it right to neither too wet nor too dry. Just like making sandcastles at the beach.
The Basic Recipe (My Go-To Starting Point):
This recipe gives you a few bath bombs of average size. Feel free to scale up or down!
- 1 cup baking soda
- 1/2 cup citric acid
- 1/4 cup Epsom salts
- 1/4 cup cornstarch
- 2 tablespoons nourishing oil (e.g., sweet almond oil)
- 1 teaspoon water or witch hazel (in a spray bottle)
- 10-20 drops of your favorite essential oils
- Optional: 1/2 teaspoon mica powder for color, dried flower petals, or glitter
Step-by-Step Instructions:
First, in a large mixing bowl, combine all your dry ingredients: baking soda, citric acid, Epsom salts, and cornstarch. Whisk them together thoroughly, making sure there are no clumps. It is very important to have even fizz and well combined color if you are adding any. If you are using mica powder, add it to the mixture and stir it well.
Next, in a separate small bowl, combine your wet ingredients: the nourishing oil and your chosen essential oils. Stir these together. Add the wet mixture to the dry ingredients slowly while continuously stirring with either hands or a whisk. You must work the oil into the dry ingredients so that the oil gets evenly spread. The mixture should be damp and hold its shape when pressed between your fingers.
Now, here’s the trickiest part: the liquid. Use your spray bottle to add one spray at a time of water or witch hazel to the mixture while stirring until you reach the desired consistency. Be very careful not to add too much at once, or your mixture will fizz prematurely! You’re aiming for a consistency that, when squeezed firmly in your fist, holds together perfectly without crumbling, but also isn’t overly wet. It is really a matter of feeling, but you will learn how to do it in no time.
When you reach the right consistency it is time to mold. Press the mixture firmly into the bath bomb molds. If you’re using two-part sphere molds, slightly overfill both halves and press them together firmly, grinding them gently to seal. If you are going to put dried flowers in the middle, leave a little space. Let them sit for a few minutes before gently tapping and releasing them onto a clean, dry surface to cure. It is such a thrill to remove them from the mold and see the product you have created.
Unleashing Your Inner Alchemist: Customization and Scents
This is where the real fun begins and you can truly make your homemade bath products unique! Once you have learned the basic recipe, you can then start customizing your bath bombs. I really enjoy trying out different colors and scents to make my own unique scented bath bombs which match my mood.
Infuse with Intent:
Aromatherapy Bliss: Essential oils serve a dual purpose of giving bath products pleasant smells while providing therapeutic advantages. Lavender and chamomile are very good for stress relief and helping you to sleep. Peppermint and eucalyptus are great for clearing your mind and helping you to get rid of a cold. Orange or grapefruit oils are excellent for a energizing and uplifting bath. Try combining different scents to get your own personal scent.
Color Play: Mica powders give vibrant, shimmery colors without staining. You can swirl different colors together in the mold for a marbled effect or even create layers. Less is more with color, particularly if you do not want a colored ring around your tub.
Adding Embeds: Want a little extra surprise? Before molding you can add tiny amounts of dried flower petals like rose or calendula or use oatmeal for skin soothing or biodegradable glitter to the mixture. Before you add anything to the mixture ensure it is safe for the drain and will not create a big cleanup job after it’s done.
Remember, this is your creative journey. You should definitely try new recipes to discover what combination provides the best results for you.
Troubleshooting & Tips for Perfect Fizz
Even with the best instructions, sometimes things don’t go exactly as planned. The first batch I made experienced cracking problems and during the second attempt the bath bombs refused to stop fizzing inside the mold. Your first attempt at creating bath bombs may not turn out perfectly so do not be discouraged by this. The process of learning to make DIY bath bombs includes all these minor setbacks that you will experience.
Common Issues & Quick Fixes:
- Cracking Bath Bombs: Your mixture probably contained too little moisture. To solve this problem in your next batch add small amounts of liquid (water or witch hazel) through controlled spritzes until the mixture can be squeezed firmly between your fingers.
- Crumbling Bath Bombs: Again, too dry. Or, not enough pressure when molding. The mixture requires sufficient force for molding. Make sure you’re really pressing that mixture into the molds! You might also need to check whether your dry ingredients received proper mixing.
- Fizzing in the Mold: Your mixture contains too much water. Baking soda and citric acid will start their chemical reaction prematurely if you add excessive water to the mixture. The mixture should be spread on a tray to dry before you attempt to mold it again.
- Sticky/Soft Bath Bombs: The presence of excessive oil results in a bath bomb product that feels greasy and soft to the touch. Cut back on the amount of nourishing oil when you make your next batch.
Expert Tips for Success:
Patience is Key: After molding your bath bombs should be left to dry completely before hardening. The drying or curing process can take anywhere between 24 and 72 hours based on the size of the bath bombs and the surrounding humidity levels. The bath bombs need to stay in a dry space that is both cool and moisture-free. I usually position my bath bombs on a tray within a room that uses a dehumidifier.
Storage Matters: After your homemade bath products become dry you should store them in either an airtight container or use individual shrink wraps to shield them from moisture. Humidity is their nemesis!
Experiment! Feel comfortable to test different bath bomb recipes and scents together with colors and additional ingredients. That’s the beauty of DIY! Your absolute favorite combination might be discovered through the process.
Clean Up as You Go: Baking soda and citric acid can be a bit messy. Clean surfaces while working to prevent any disorganization.
Ready to Fizz Your Way to Relaxation?
My journey of learning how to create bath bombs has been one of great pleasure. The pursuit of saving money on luxury products transformed into a true passion and creative activity that helps me reduce stress while crafting lovely products by hand. Watching a homemade bath bomb dissolve in hot water while it creates a soothing fragrance experience brings deep contentment to me.
DIY bath bombs provide an excellent option for those interested in creative hobbies while saving money and tailoring self-care routines. The products serve as perfect thoughtful presents you can give to your loved ones and friends. Prepare to turn your standard bath into a spa paradise by gathering your bath bomb supplies and enjoying music while creating your extraordinary bath experience. Happy crafting, and happy soaking!